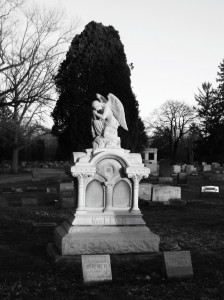
 I stopped at a local cemetery the other day to take a few photographs before the sunlight vanished. I took a few regular photos, but what I really had in mind was getting exposure brackets for HDR photos. One of the standard photos turned out fairly well, particularly when desaturated and having the contrast tweaked a bit.
That particular photo (shown at right) also prompted a thought which stuck in my mind. I had originally been about two feet to the right of the point where I took the photo, but I realized that the monument was oddly placed in comparison to the evergreen trees in the background. Half of the monument would have been in front of the trees while the other half would have been in front of blank sky.
At that moment I realized that I was actually lining up the photograph and thinking about the results. I usually take photos for more functional rather than aesthetic purposes, so this marked a bit of a departure from what I’m used to doing.
As I mentioned, though, standard photographs weren’t what I had in mind when I stopped at the cemetery. I went with the intention of taking some bracketed exposure sets to use in creating HDR images.
CHDK and Exposure Bracketing for HDR
The camera I currently use is not a terribly expensive one. It’s a simple Canon A590 IS “point and shoot” digital camera. I purchased this model specifically because it could run the CHDK firmware enhancement. One of the many features available with CHDK is exposure bracketing. Some cameras are including exposure bracketing in their options, but it’s not yet a standard item on consumer cameras. Even the iPhone 4 acquired HDR capabilities with the iOS 4.1 update in 2010.
Exposure bracketing is taking several photographs in a sequence, varying one attribute of the exposure by a set amount with each shot. For HDR images, it’s most common to vary the exposure time of the shots taken in each bracket.
For the three sets of images I took in the cemetery that day, I used the same bracketing method. Each bracket set contains seven exposures. One exposure, in the middle of the bracket, is taken at what would be the “normal” exposure time. The exposures on either side of that image are taken with an exposure time (Ev) one step above or below the adjoining image. If the “normal” exposure is 1 second, the other exposures would be ½, ¼, and ⅛ seconds on one side, with 2, 4, and 8 seconds on the other side.
The change in exposure time for each shot in the bracket is variable, from ⅓ step to 4 steps. The number of exposures taken in a bracket is also variable. You can set a specified number of shots to take (seven, in this case), or let the camera continue to halve and double the exposures to the physical limits of the hardware. It is also possible to create brackets by varying the aperture, the focus distance, or the ISO, but exposure time is the most common value to use for HDR photographs.
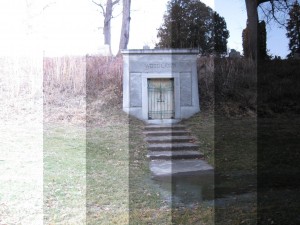 Here is a composite view of the seven exposures I took for the first HDR image of that day at Woodlawn Cemetery. The exposure times are (from left to right) 1/8 second, 1/15 second, 1/30 second, 1/60 second, 1/125 second, 1/250 second, and 1/500 second. All seven shots were taken at f/2.6, ISO 160. I simply left the camera on automatic for the exposure and focus choices.
Processing Exposure Brackets with Luminance HDR
There are several software packages available which can be used to process an image stack into an HDR image. The one I use, Luminance HDR, is an open-source project. The program is available for Linux, Macintosh, and Microsoft Windows operating systems.
The individual exposures from an image stack are loaded into the program. Exposure details are read from the EXIF information in those images. The next stage is for the images to be properly aligned. Even with the camera on a tripod, minute vibrations will cause slight variations in the alignment of the subject within the individual images. HDR processing software will often automatically align the images, but it’s nice to be able to manually verify the alignment and make adjustments if necessary.
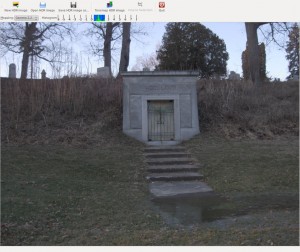 Once the images in the exposure bracket, or stack, have been aligned, the software will then compile them into a single image with much greater dynamic range than is possible with a single exposure from your camera. As you can see from the screenshot at the right, the image does possess qualities of the different exposures which went into its making. Still, though, it doesn’t really seem to be anything special.
The human eye has a visual dynamic range of between 10 and 14 stops (1024:1 to 16384:1). Some Canon cameras have built-in capabilities to take exposure brackets with a range of 18 stops. The OpenEXR image format (an open-source format for HDR images) can be used to represent images with a dynamic range of over 30 stops. HDR images can represent a visual dynamic range greater than human beings are even able to perceive. This raises an interesting question: How are we supposed to view HDR images?
Presenting HDR Images on LDR Media
Not only can we not perceive the dynamic range possible in HDR images, we really don’t have suitable media to display them in the first place. LCD displays usually only display a dynamic range of about 9½ stops (700:1). Though higher ranges are available, they’re still not even close to what would be required to display these images natively. LDR displays require an HDR image to be processed in some way.
The dynamic range is often clipped or compressed in order to present it on the medium we happen to be using as a display. The screenshot shown previously presents the HDR image with the dynamic range compressed to fit the output range of the display. Though an image displayed in this way can show a great deal more of the scene than would ordinarily be encompassed by traditional imaging, there is another method of processing available: tone mapping.
Tone mapping is a standard procedure where certain tones in an image are mapped to certain other tones which can be used in a particular display medium. The photographs taken for use in a magazine, for instance, contain much greater dynamic range than that available by printing the image onto paper. Tones must be mapped in such a way that they can provide the detail and contrast necessary to adequately display the image using a particular medium.
Tone mapping operators (the mathematical functions used to process an image) are of two main varieties: global operators, and local operators. The global operators apply their specific function to the image as a whole. Though global operations are often simple, and can be applied quickly, they often result in a lack of contrast in the displayed image. Local operators, on the other hand, apply specific functions to the individual pixels of an image based on the content of its neighboring pixels. In this way, local contrast can be preserved, while the overall contrast of the image is reduced. This method can often fool the eye into perceiving greater contrast than is actually present in the displayed image.
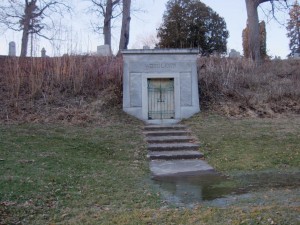 This example uses an operator sometimes referred to as “Reinhard ’05.” The mathematical algorithm in this operator comes from a paper titled Dynamic range reduction inspired by photoreceptor physiology by Erik Reinhard and Kate Devlin. The operator takes its common name from the principal author of the paper and its year of publication. The resulting image is quite realistic in it presentation, and could easily be identified as a simple photograph.
The operators used to tone-map an HDR image produce results which can range from subtle to extreme. As with visual media of all types, beauty is in the eye of the beholder. The results of some tone mapping operations may seem ethereal and surreal to one person, while appearing garish or cartoonish to another. Rather than bore you with further details about tone mapping operators, I now present a couple different versions of each of the three exposure bracket sets that I photographed in the cemetery.
I like the “abandoned” look this one seems to have. 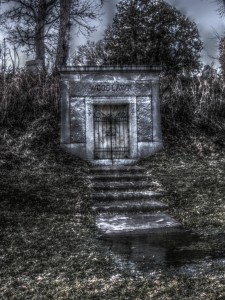
This one reminds me of hand-tinted photographs that I’ve seen. 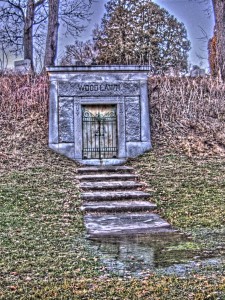
There really wasn’t any snow or frost that afternoon, but the contrast processing makes it appear that way. 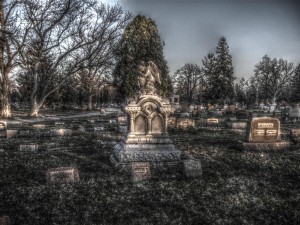
In the standard photographs from this set, the lines of text on the two plaques weren’t visible at all. 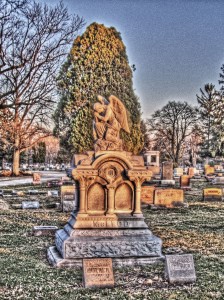
The variations in the contrast make this one seem almost like an old photograph that has been warped by heat or moisture.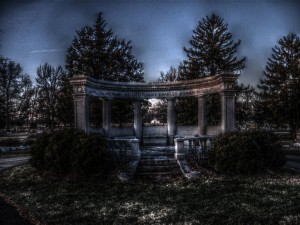
This is a good example of the vibrancy and contrast being apparent when viewed closely, but from a distance (or smaller) it seems very flat and of low contrast. 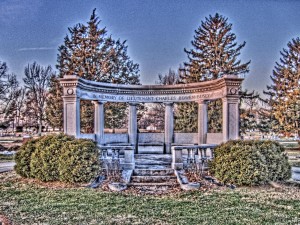
That’s enough for now
It should be apparent now that there is a great deal of variation in the results of post-processing when it comes to HDR images. Tone mapping can provide a look into how we perceive contrast and color in our daily lives. I don’t look at shadows or blown highlights the same way any more. I’m looking forward to getting out and taking some more exposure bracket sets in the coming months. I’ll share them here when I do.

Recent Comments