I must admit that I’m not much of a photographer. I do, however, have a digital camera that I like to play around with. I based my camera purchase partly on the ability of the camera to run CHDK (Canon Hack Development Kit). This software greatly enhances the capabilities of the camera, including saving in RAW mode, USB-cable remote shutter-release, motion-detection trigger, customizable high-speed continuous (burst) Tv, Av, ISO, and Focus bracketing (increasing depth of field), shutter, aperture, and ISO overrides (shutter speeds of 64 seconds to 1/10,000 seconds and higher), High-speed flash sync, and much more.
One of the features of CHDK that I would like to take more time to explore is Tv Exposure Bracketing. Basically this mode allows the camera to take a series of exposures, varying the exposure time by a set amount for each exposure. One of the exposures is taken with the “normal” exposure time, and each of the others is adjusted up or down by the set amount. Using special software, the separate exposures are combined to produce a single image file that has a much greater dynamic range than is possible with the camera’s native files. This technique is usually called HDR (High Dynamic Range) imaging.
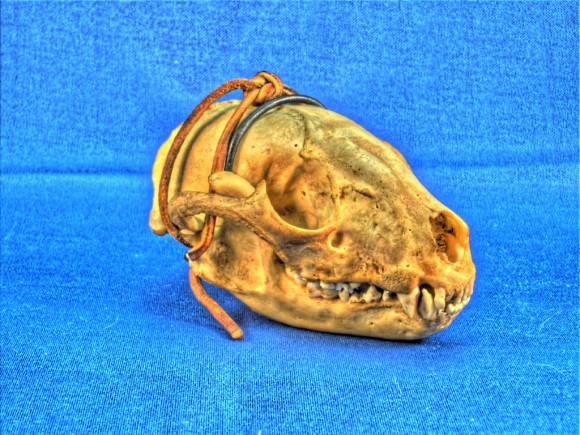
This afternoon I took a series of bracketed exposures of a raccoon skull that happens to sit on my desk (don’t ask). I used the excellent Linux program Qtpfsgui to combine five exposures into a single HDR image. Unfortunately, even today’s high-end graphics cards and LCD computer monitors lack the ability to natively display HDR images. A technique called tone mapping is often used to render the HDR image in a LDR format (such as the JPG images we’re all familiar with). With this photograph I used the Gradient Domain High Dynamic Range Compression algorithm (sometimes called the Fattal algorithm, developed by Raanan Fattal, Dani Lischinski, Michael Werman) in preparing the LDR representation below. (Click on the photo for a much embiggened view.)
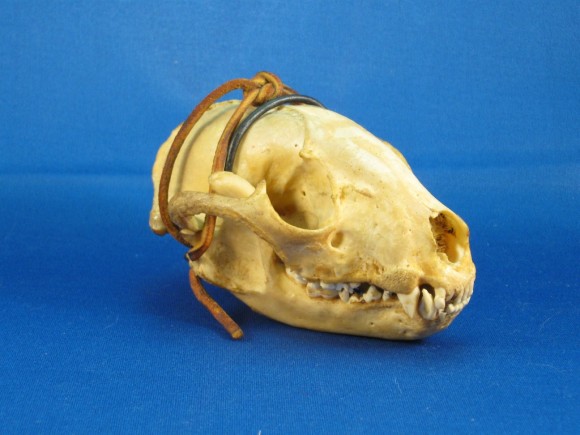
The Fattal algorithm often produces somewhat surreal representations of the HDR image. I suppose that’s why I like it so much. For reference, below is the image the camera took as the center of the exposure bracket. This image uses the preferred exposure determined by the camera for the subject (no flash was used). (Click on the photo for a much embiggened view.)
The difference in the photos is quite striking. The non-HDR image is a rather faithful reproduction of the skull at first look, but when compared to the object itself seen in real life, contrast and subtleties that your eye picks up are missing from the photo.
When I play around with this technique some more, I’ll be sure to post the results here for all to see.


1 comments
Great post dude. I based my purchase based on a software based crack on a camera that released its full potential.